
Choosing the right size drywall knife is crucial for any project. The size of the knife will vary based on the task at hand. To help you select the appropriate knife for your next project, we’ve outlined the various sizes of drywall knives. By utilizing this guide, you can ensure that you have the correct tool to achieve optimal results.
For hand-taping, picking angles, covering screws, and wall patches, a 3-inch to 6-inch Drywall knife is ideal. If you need to smooth wider lines and patch the tub surround, opt for an 8 or 10-inch knife. A 12-inch knife is the best option for feathering and applying final coats. Varying the knife size is crucial for achieving a polished finish.
Using a small knife can make the task more challenging when feathering and applying final coats. While technically, any knife size can be used for the job, opting for knives specifically designed for drywall work can make it much easier. If you’re unsure about investing in specialized knives, you may wonder if you can use a different type of knife instead.
Mastering Drywall: The Ultimate Guide to Knives
Drywall finishing (depending on what level of finish) requires various tools, and one of the most important is the drywall knife. We can say that drywall knives spread and smooth out drywall mud or joint compound, covering holes, cracks, seams, nails, and screws. By applying mud, laying on the tape, and completing the drywall finish, this tool helps to achieve a smooth, seamless surface.
Different types of drywall knives are available depending on their blade size. Joint drywall (unless you want to caulk your joints) knives range from four to six inches and are perfect for use in tight crevices and for applying mud and pushing it into the holes, cracks, and seams produced by the screws. On the other hand, ten-inch taping drywall knives apply the second coat or taping coat on the drywall, while the twelve-inch flexible drywall knife finalizes the coats by feathering out all the drywall mud and giving a smoother surface and perfect finish.
Choosing The Right Drywall Knife: Size Matters
When choosing the right drywall knife, size matters. If you are in the first stages of the project, you will need six-inch or smaller knives to put more pressure on the smaller spaces and bends so that the drywall mud perfectly covers the screws, joints, and holes. Medium-sized knives are perfect for mud application and finishing touches. Knives over six inches are good for smoothing tracks, feathering mud, and finalizing the walls.
The breakdown of different sizes of drywall knives and their uses is as follows:
| Drywall Knife Size | Uses |
| 3-inch | Perfect for filling tight areas and awkward angles |
| 4, 5, and 6-inch | Ideal for hand-taping angles, picking angles and covering screws and wall patches |
| 8, and 10-inch | Suitable for wiping tape, smoothing wide lines, and patching tub surrounds |
| 12-inch | Used for feathering and applying final coats |
Get The Job Done Right: How To Use Your Drywall Knife
Using a drywall knife can be challenging, but with practice, you can master this tool. Avoid overthinking if you find the compound on the floor rather than the drywall when applying it for the first time.
To use a drywall knife correctly, hold it properly. If you have a traditional drywall knife, place your thumb below the handle and two or more fingers above the blade to apply a proper pressure. If you have a drywall knife with an offset handle, hold the handle fully and lay the blade flat against the working surface.
Follow these step-by-step instructions to work a drywall knife:
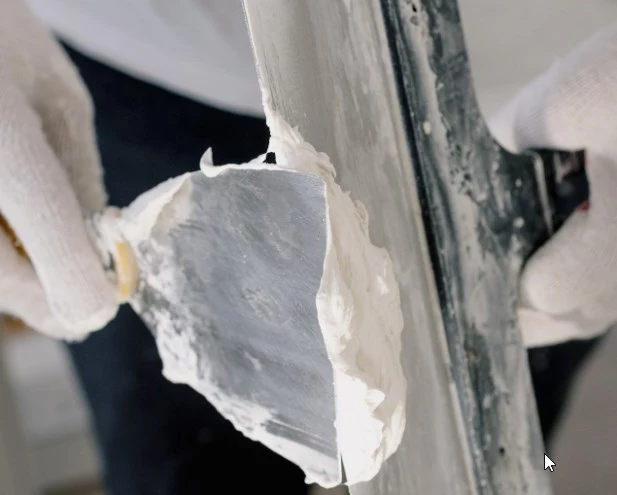
Step #1 – Apply the 1st Coat of Drywall Mud
Load the blade with drywall mud using a four-inch, five-inch, or six-inch drywall knife and around two inches of drywall mud using the blade’s edge. Start at the corner of your room and force the drywall mud into the seams present between the drywall panels and any spaces left by the screws or drywall nails.
Hold your knife at a 25-degree angle when the seams are filled to smooth out the surface in a single go. Scrape off the excess drywall mud and place it into your drywall joint compound tub. Remember that depending on the compound you have, the pressure you need to push might differ.
Also, depending on what compound you’ve bought, meaning the green lid or blue one, how much pressure you need to push might differ.
Step #2 – Run Drywall Tape Over the Seams
Center the joining tape onto the seam and press it into the freshly spread drywall mud. If working along a vertical seam, start from the top and work toward the bottom.
Cut the drywall tape off at the end of the seam and place the edge of your taping knife perpendicular to the face of the tape and tear off the excess tape. Then, please start at the middle of the freshly taped joint and pull the knife towards the end of the joint, holding it at a 25 degrees angle. Press firmly to avoid bubbles and smoothen out the joint compound.
If you have to put the drywall tape inside a corner joint, cut the tape according to the size of the joint and fold it lengthways and insert it. Use your drywall taping knife and gently push the tape into the corner. Then, smooth it out to ensure no creases or bubbles are left.
Use your drywall taping knife and push the tape into the corner gently. Then smooth it out to ensure no creases or bubbles are left.
Step #3 – Apply the 2nd Coat of Drywall Mud
Take a ten-inch or twelve-inch drywall knife and apply a second coat. Scoop up around two inches of drywall mud and apply it on top of all the joints, seams, and screw or nail holes. Run the larger drywall taping knife while applying slight pressure on top of the joint compound to smoothen it out.
Leave the drywall mud to dry for four to six hours or overnight, depending on the project. These guidelines teach you how to use a drywall knife for perfect results.
Step #4 – Sand the Surface
After the drywall mud has dried completely, it is time to sand the surface. Use fine-grit sandpaper and lightly sand the entire surface to remove any bumps or ridges. Be sure to wear a dust mask to avoid inhaling the drywall dust.
Step #5 – Apply the 3rd Coat of Drywall Mud
The final step is to apply the final coat of drywall mud. Use a twelve-inch drywall knife to apply a thin layer of mud over the entire surface. Be sure to feather the edges to blend the mud with the rest of the surface.
Using a drywall knife may seem daunting at first, but you can achieve professional-looking results with practice and patience. Remember to hold the knife properly, vary your pressure, and use descriptive language to guide your readers through the process.
FAQs:
Is A Drywall Knife The Same As A Taping Knife?
Tap and drywall knives can typically be used interchangeably when applying drywall mud. Both are designed to smooth out the compound, resulting in a smooth finish. However, it’s worth noting that while drywall knives can serve multiple purposes, taping knives are specifically designed for applying the taping coat.
Why Are Drywall Knives Curved?
A drywall knife is beneficial due to its curved shape, which helps keep the blade corners from touching the taping surface. This results in a smoother, more finished appearance. Additionally, it is useful for feathering the compound on joints to achieve a perfect finish. Alternatively, Drywall corners can be caulked as another option.
Can I Use A Plastic Drywall Knife?
Absolutely. While most DIYers and professionals opt for plastic drywall knives due to their flexibility and lightweight design, they are generally not durable for long-term use. As a result, a drywall knife can be utilized as a taping knife but may not be the best option for those who require a tool that will withstand frequent and prolonged use.